Creating a virtual environment to develop pythons seems trivial, however it becomes quiet difficult to manage ROS2 python packages using virtual environment. This article demonstrates how to use conda to manage ROS2 python packages.
Praparing conda virtual environment#
Creating a conda virtual environment
conda create -n your_environment_name python=3.12.3Replacing
your_environment_nameto the name that you want to assign to the virtual environment. You could also change the python version as you needed.activate the virtual environment and install
colconcolcon colconconda activate your_environment_name pip install rospkg pip install -U colcon-common-extensionsInstalling colcon in your virtual environment is very important! It will automatically change the shebang setting to use the virtual environment
Compile the ROS2 packages#
Going to your ROS2 workplace, then running:
python -m colcon build
Using python -m instead of direction using colcon make sure that your virtual environment is used when compiling and running.
Add any parameters as you need like: --packages-select, --symlink-install.
Source the packages and run#
Source your packages and run it:
source install/setup.bashrc
ros2 run your_package your_nodes
The python in your virtual environment will be used to execute the code.
A little more explain#
When using ros2 run command to run a python file, a script in install/your_packages_name/lib/your_packages_name/the_entries_name will be executed.
the script looks like:
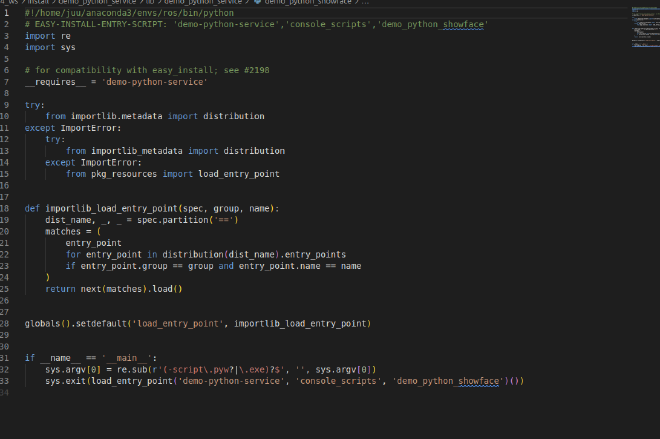
The first line is shebangs, which specify the python to execute the code.
If you uses colcon (instead of python -m colcon) to compile the package, the first line usually has default: #!/usr/bin/python.
You can also manually change this line to specific python path that you want to run, but it will change to default value every time you use colcon.
Reference#
https://colcon.readthedocs.io/en/released/user/installation.html